Look what’s leafing out over on the side of the house. It’s our old friend rhubarb, springiest of spring dessert vegetables. Maybe you don’t yet feel like you’re so flush with the ‘barb that you can go full dessert, like with a geometric tart or a make-it-anywhere rhubarb crisp, but like me, you’re always in the mood for a tangy refresher. Enter shrub, or drinking vinegar. It’s a piquant sort of swizzle that you use to tart up plain soda water. (People say vinegar is also good for the gut.) I’ve gotten kind of addicted to it.
Shrub can be made cold, by macerating rhubarb for a couple of days with sugar in the fridge, straining it and then adding vinegar. I do a hot version because it’s a little faster. Inspired by my shrub mentor, Kim Severson, I add some thyme to give it a little herbal complexity. It produces the most lovely magenta syrup. You’d also be crazy not to eat the solids, which make a delectable savory jam. This recipe is written small, to accommodate our new crop, but it doubles easily and makes a great gift. Good for shrubarb cocktails —Google it — and nice to have on hand as a fizzy water mixer for friends who don’t drink alcohol.
Rhubarb-thyme shrub
Makes about 1 cup shrub
1 pound (or roughly 2 cups) chopped rhubarb
½ cup white sugar
½ cup apple cider vinegar
½ teaspoon dried thyme or three sprigs fresh thyme
Unflavored sparkling water to serve.
Instructions: In a medium saucepan, combine rhubarb, sugar, thyme and apple cider vinegar. Simmer over medium heat until the rhubarb is completely broken down. Strain liquid into a resealable container. Serve about 2 tablespoons over ice with sparkling water, adding more to taste. Can also be added to champagne to make a festive cocktail or splashed into a gin and tonic. (Remove the thyme sprigs and reserve the rhubarb solids, which are basically a sweet-savory jam. Serve with roast meat, chicken or spread on buttered toast.)
Beau Schooler’s basic sourdough bread (Photo by Julia O’Malley)
Like so many Alaskans, the minute I suspected we were all headed for the bunker last month, I started feeding my sourdough starter. I’m a pancake person, but I texted my friend Beau Schooler, a chef and baker down in Juneau, about how to raise a loaf.
Schooler is a meticulous sourdough genius at In Bocca Al Lupo, a restaurant in a bakery building that’s been raising loaves with natural yeasts for a century. He sent me an opus of a recipe for an impressive chocolate-cherry loaf that got psychedelic about the universe and bread science. By then, though, my usual life had ceased to exist.
I found myself on the couch editing a stream of breaking news stories that got darker each hour. My children fought and did flips and performed songs and begged me to pay attention. My youngest said he dreamed I was slamming a door in his face. My oldest quit going outside. The news rolled on. The price of oil sinking. The economy crumbling. New York City swallowed by illness. Friends losing jobs. Friends losing family members.
I started to have episodes of shortness of breath, but realized it was just panic. I texted Schooler that I couldn’t do it. The starter was dead on the counter. I couldn’t think.
Down in Juneau, Schooler’s phone pinged with my text while he was making take-out frozen pizzas in his empty restaurant, trying to reason how his business could pull through the summer with no cruise ship tourists. Feed my starter and wait, he texted back. I stirred in some flour and water. The next morning, it bubbled back to life. I texted him that I couldn’t figure out why the sight of it made my eyes fill with tears.
“It’s ok, friend,” he texted back. “It’ll be ok.”
Then I began to work my way through a simplified version of his recipe. I mixed, kneaded, waited, folded. The most important thing is to have a reliably warm place to rise the dough, preferably in the neighborhood of 80 degrees. I set mine on the boiler. Watching those first loaves rise felt like witnessing a miracle. They baked into sour, crisp-crusted masterpieces. The children ate warm bread with butter. In an inside-out world, so much comfort comes from witnessing a natural process that works out the way you expect, you know?
I’ve made 16 loaves now, and have messed up every step. I forgot salt and added it late. I didn’t let it rest. I let it rise too long. Even so, the loaves came out. I walked them over to my parents’ and set them on their porches. The key to all of it, I found, like with so many things that feel impossible, is to take it one step at a time and to do your best.
Beau Schooler’s basic sourdough bread
Makes two loaves
Ingredients:
6 1/3 cups unbleached bread flour
Heaping 1/2 cup + 2 tablespoons whole wheat flour (you can skip this and sub additional white flour)
2 3/4 cups + 2 tablespoons room temperature water
1 1/2 tablespoons salt
3/4 cup sourdough starter, charged and at its peak
To charge up your starter:
Mix 2 tablespoons of active starter with ½ cup flour and ½ cup water, cover it with a damp cloth, and let it sit at room temp, away from drafts, for 10-12 hours or overnight. (I put mine in the oven with the light on.) When it’s ready, you should be able to take a chunk of it, drop it in water and it should float. If it doesn’t, feed it again, it’ll get there.
To make the bread:
When the starter is bubbly and ready, pour the water (except for the two tablespoons) into a bowl large enough to fit everything. Then add the flours. Combine by hand, kneading it into a shaggy mass. Allow it to rest for 30 minutes. Add the starter to the dough, knead it in by hand. The dough will be sticky. Cover with plastic wrap and allow to rest for 30 minutes in a warm place.
Next you’re going to give the dough its first fold in a series of four folds, done every half hour. The first time you do this, stir the salt with the two tablespoons of water and fold it in. Then shape the dough into a ball and move it to a lightly greased bowl. It’ll stay in that bowl till you bake it.
On the folding technique, Schooler says: “You can do the folding in the bowl, no need to take the dough out. Imagine it as a square. You’re gonna take the side of the square closest to you, grab it from the edge and lift up, stretching it until it seems like it won’t stretch anymore without tearing, then press it into the middle. Repeat with the three remaining sides, then flip the whole thing over in the bowl, so the bottom is now the top.”
Repeat the folding process three more times, each time a half hour apart. Always cover it and let it rise in a warm place. Then let the dough rise, covered, in the warm spot, at least two hours, or so that it’s at least 25% larger. Depending on what else you’re doing, you can go as long as 5 hours.
When the dough has risen, gently dump it out onto a lightly floured counter and cut it into two equal portions. Take each one and gently fold it into a ball, then place them seam-side down on the counter. Cover with a towel and let them sit there to relax for like half an hour, “until they start to slack out and flatten like pancakes,” Schooler says.
In the meantime, lay two dish towels inside clean bowls and generously flour them. (Schooler rubs the flour into the towels on the counter before he puts them in the bowls.)
Next, take one of the dough balls and gently pick it up, placing it down in front of you on the lightly floured counter, smooth side down. Imagine it as a square with 4 corners, Schooler says.
“Grab north and south corners, stretch them out and then press them into the middle, slightly overlapping each other, then do the same with east and west, out and then into the middle, overlapping each other. Repeat,” Schooler says.
You should end up with a taut ball. Place the ball, seam-side up, into the rising bowl with the dish towel. Repeat with the second dough ball. Cover loosely with a plastic shopping bag, then let it rest on the counter for about 15 to 20 minutes before moving to the refrigerator overnight.
In the morning, place a lidded dutch oven, or two if you have them, into your oven and heat it to 475 degrees.
Once the oven is preheated, take out your dough or doughs, depending on how many Dutch ovens you have heating. You will flip the dough, seam side down into the hot dutch oven. (Careful!) Quickly, take a razor, a box cutter or sharp knife, and cut a X across the top of each dough ball, about a 1/4” deep, and all along the top.
“Grip it and rip it, don’t be scared or the knife will catch and tear your dough, maybe even deflate it,” Schooler says.
Put the lid back on the dutch oven (or ovens) and place in the oven. After 20 minutes, take the lid off the pot. Let the dough bake 20 minutes more, uncovered. Let it get dark, almost burned.
“Don’t be a poser about it,” Schooler says. “Trust the process.” (I was a poser and used to take mine out after 16 minutes, because I have a short double-oven and it always burned. But then I discovered: If you have an oven like mine, you can bake the bread for longer and avoid a scorched bottom by putting a pizza stone on the rack beneath it.)
Take the pot out of the oven and dump the bread onto a wire rack to cool.
Schooler says: “They say you shouldn’t cut into hot bread, but they’re liars and are just telling you that because they’re insecure. Do whatever you want, it’s your bread.”
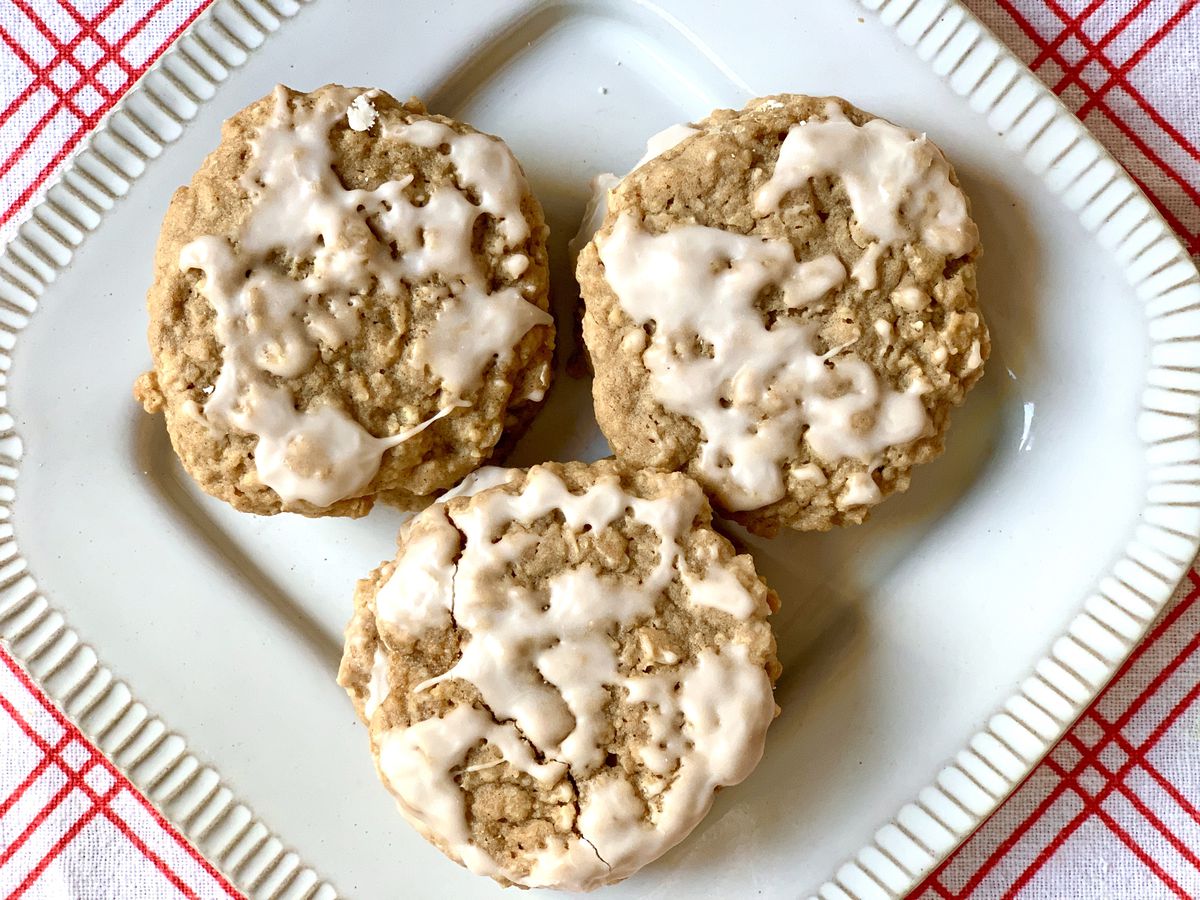
My Uncle Bob lives a couple doors down. He’s a retired oil engineer, a Brit, fond of black coffee, crispy toast, dry white wine and, on occasion, an iced oatmeal cookie. At this very moment, in fact, I’m pretty sure there is a package of Mother’s Iced Oatmeal cookies in a drawer in his kitchen, sealed very precisely with a rubber band.
I decided recently I’d try to make him a cookie that might please him like a Mother’s does and got to experimenting with copycat recipes. I wanted the dark color, uniform shape and that crinkle top with the frosting. The key to the crinkle, the internet says, is to lightly process the oats so they are just a little finer. (I think you could skip this step if you’re looking for taste rather than aesthetics.) The other tip is to frost them very lightly, just kissing the top of the cookie to the icing. These cookies have a dreamy softness and are a bit more delicate than the ones in Uncle Bob’s drawer, but when I sent them down the block, he didn’t seem to complain.ADVERTISING
Iced oatmeal cookies
Makes 12 to 14 cookies
Cookies:
1 cup rolled oats
1 cup white flour
½ teaspoon baking soda
½ teaspoon salt
3/4 teaspoon cinnamon
1/4 teaspoon nutmegADVERTISING
¼ teaspoon allspice
½ cup (1 stick) butter, softened
½ cup dark brown sugar, packed
¼ cup granulated sugar
1 egg
1 tablespoon molasses
1 teaspoon vanilla
Icing:
1 cup powdered sugar
¼ teaspoon vanilla
1 1/2 tablespoons half-and-half
Preheat the oven to 350 degrees. Line a baking sheet with parchment. In the bowl of a food processor, pulse the oats for about 10 one-second pulses. Add flour, soda, salt and spices. Pulse five more times. In a standing mixer on medium speed, beat butter until fluffy and add sugars. Beat until well combined. Add egg, molasses and vanilla. Shake the oat mixture a little at a time into the wet ingredients and beat until mixed evenly.
To make uniform cookies, scoop the dough with a 1 ½ tablespoon cookie scoop and press them gently to flatten. Bake for 12 minutes and then allow to cool for 10 minutes on the pan to set up before removing to a rack.
To make icing, stir sugar, vanilla and half-and-half vigorously until smooth. It will be thick. To frost the cookies, quickly dip the tops in the frosting so they just touch the surface and pull away, allowing any excess to drip off. The idea is to just kiss the tops of the cookie with frosting, avoiding a full dunk. The icing will be set after an hour or so.
Bullet proof coffee will keep you warm on the inside. (Julia O’Malley photo)
For Christmas, my cousin’s girlfriend gave me “The Mexican Keto Cookbook,” written by her friend Torie Borrelli, who is a nutritionist in California. I’m not on the keto diet but I really enjoyed the cookbook, and it got me on this kick making “bulletproof coffee.” That would be coffee with butter in it. I know, sounds weird, but stay with me.
I have been on the morning protein smoothie train for a while, not because my sugar-free green smoothies are delicious, but because they are healthy and fast and keep me from being possessed by a wolf-like hunger that leads to eating office doughnuts. This coffee serves the same purpose and is more tasty. And I’ll tell you what: a warm, fatty, fragrant potion, sipped while driving through the icy darkness in the morning, feels pretty right.
The flavor, if you add cinnamon, is a little like Mexican hot chocolate, but not too sweet. It took me a week of experimenting to get my ratios right. Another bonus: something about adding the fat mellows out my caffeine jitters. (I totally drink a non-butter “appetizer coffee” while making the butter one. I’d only recommend that for serious coffee drinkers.) I put a scoop of collagen peptides powder, which is basically just flavorless protein, at the bottom of my travel mug, pour the coffee from the blender in, put the top on, and shake it up. If you lack a blender, you could probably just give the whole concoction a vigorous shake in a closed container like a mug or jar and it would work fine.
One last thing, because Costco just knows things: Just about all the ingredients for bulletproof coffee are at Costco in Anchorage right now, including cacao powder, Kerrygold butter, MCT oil, and collagen peptides powder.
Bulletproof coffee
8 ounces hot coffee (decaf is fine)
1 tablespoon good quality butter, like Kerrygold brand
1 teaspoon cacao powder
Optional:
1 tablespoon MCT oil
1 10 gram scoop collagen peptides powder
1/2 teaspoon ceylon cinnamon, or more, depending on your preference
½ teaspoon vanilla
Liquid Stevia, to taste
Put the hot coffee, butter, cacao, and, if desired, cinnamon, MCT oil, vanilla and/or stevia in a blender. Blend on high for 30 seconds until frothy. If desired, put a scoop of collagen peptides in the bottom of the mug before pouring in the coffee and stir to combine. Consume immediately.
The idea for this recipe started at Black Cup Coffee a month ago, where one day I decided to order their pumpkin-spice latte. They make it with sweetened condensed milk that’s been infused with pumpkin and serve it with nutmeg, sourced from Summit Spice across the street. It is so fantastically subtle and miles away from the cloying, aftertasty Starbucks PSL.
Later that day, on a pumpkin bender, I decided to buy a cute sugar-pie pumpkin at the grocery store. Later on, I poked it with a fork and put in it a 325-degree oven for an hour or so until it got really soft. Then I cut it in half, scraped out the seeds, and piled the meat in a bowl. It was exactly 2 cups, just like a can of pumpkin.
Then began an obsessive couple weeks of pie-bar making. I’m a late comer to cookie butter, which is a delicious, jarred emulsion made of Biscoff cookies. But that flavor combined with not-too-sweet pumpkin and a little sea salt is really something. You can use roasted sugar-pie pumpkin or canned for this recipe. If you want the bars less sweet, reduce the condensed milk by a quarter-cup and sub in cream. The bars will slice after cooling completely but they slice best after being refrigerated. A little dollop of whipped cream on top is optional.
1 15-ounce can pumpkin or 2 cups of roasted sugar pie-pumpkin, packed
3/4 cup sweetened condensed milk
1/2 cup heavy cream
2 eggs
1/4 teaspoon sea salt plus a pinch for the pan
1 teaspoon pumpkin pie spice
Preheat the oven to 350 degrees Fahrenheit. Spray a 9-by-13-inch pan with cooking spray and sprinkle the bottom with a pinch of sea salt. Mix the Biscoff crumbs with butter and press into the bottom and about an inch up the sides of the pan for the crust for the bars. Bake for 5 minutes, remove from oven and set aside. In a bowl, combine pumpkin, condensed milk, cream, eggs, salt and spice. Mix well. (If using fresh pumpkin, you should combine the ingredients in a blender, food processor or with a hand blender.) Spread the filling into the crust. Bake for 40 to 50 minutes, or until the center of the bars has set. Refrigerate for at least an hour before slicing with a sharp knife.
Red salmon with grilled broccolini. (Julia O’Malley photo)
Fishing season’s just winding down, but salmon dinner season is in full swing. When I get home from work to find a thawed fillet waiting in the fridge, my latest quick dinner plan is salt, pepper, a perfect medium-rare grill and a hit of compound butter that I have pre-made and waiting. Dinner can be on the table in 20 minutes or less, depending on the sides.
My freezer is full of reds and, in my experience, on a medium temp grill it takes six to seven minutes to cook a fillet the way I like it, with just a little oval of translucent flesh in the center of the thickest part. It finishes cooking on the plate once I take it off the heat, leaving it a perfect medium rare. (By medium grill, I mean one that you can hold your hand over for 15 seconds without getting burned. If you have a thermometer, it would measure roughly 350 degrees.) You can also put the fish under the broiler for about the same amount of time.
Next: I hit it with compound butter, which, for the amount of effort it takes to make, delivers a miracle of satisfying flavor, salt and fat. The kids like it on their rice and bread, too, so maybe make a little extra.
I make the butter and store it in a jar in the fridge, where it keeps from a couple of weeks to a month, depending on the ingredients. Lately I’ve been rocking some nostalgic weeknight fish dinner flavors from my Alaska childhood: Tony Chachere’s Original Creole Seasoning and a nice sea salt-dill-lemon mixture that pleases a crowd. But you can try: thyme and Meyer lemon zest, Thai chile and lemongrass paste (finish it with fresh cilantro), shallot and tarragon, lemon juice, garlic and Tabasco, Yoshida’s sauce or Sriracha sauce. The combinations are kind of endless — experiment with about 2 tablespoons of spice or up to 4 tablespoons, combined, of fresh herbs, citrus and savory ingredients.
Compound butter for salmon
Each 8-tablespoon recipe is enough for three red salmon fillets, between 1 and 2 pounds each
Creole butter
8 tablespoons (one stick) salted butter, room temperature
In the bowl of a standing mixer or using a wooden spoon, stir seasoning into the butter until well combined. Spoon into a jar and keep refrigerated until ready to use. Keeps in the refrigerator for two weeks when using fresh herbs, and six weeks when using a spice mix only.
I wrote in August about the surprisingly low red return this summer for the New York Times.
The story begins like this:
ANCHORAGE — After just a few hours of letting the current comb through his net in the Copper River, Shane Cummings knew that something wasn’t right.
Dr. Cummings, a sports medicine specialist, had driven 250 miles east of Anchorage with a seasoned fishing party, including a few men who had gone to the river every summer since the 1960s. They motored between sandbars to a familiar spot, and slid the wide hoops of their nets into the steel-colored water.
In a good year, they could pull 70 or 80 red salmon from the river, which they would later brine in sugar and salt and bathe in alder smoke, their Little Chief smokers puffing in their driveways. They would carry Ziplocs of fish to the neighbors and set long tables in their backyards, pulling fillet after fillet off the grill.
But as the hours passed on this day in early June, nobody on the river netted a red, or even saw one. “It wasn’t usual at all,” Dr. Cummings said.
I also wrote a short essay about how this story came to be and how a news story can’t really capture the weirdness of climate change in Alaska. (I kind of liked writing it better than than actual story, too…)
This is a truly Alaskan sort of food story because in Alaska’s rural places, subsistence foods mean far more than dinner on the table, it’s about culture, values and community. I’m very grateful photographer Ash Adams and I had the opportunity to travel to Gambell for High Country News to hear the story of a teenage whaler, Chris Apassingok, who became a target of online harassment after he took his first bowhead whale.
Here is a meal we shared with his family:
Here is how the story begins:
Gambell, Alaska — Before his story made the Anchorage paper, before the first death threat arrived from across the world, before his elders began to worry and his mother cried over the things she read on Facebook, Chris Apassingok, age 16, caught a whale.
It happened at the end of April, which for generations has been whaling season in the Siberian Yupik village of Gambell on St. Lawrence Island on the northwest edge of Alaska. More than 30 crews from the community of 700 were trawling the sea for bowhead whales, cetaceans that can grow over 50 feet long, weigh over 50 tons and live more than 100 years. A few animals taken each year bring thousands of pounds of meat to the village, offsetting the impossibly high cost of imported store-bought food.
A hundred years ago — even 20 years ago, when Gambell was an isolated point on the map, protected part of the year by a wall of sea ice — catching the whale would have been a dream accomplishment for a teenage hunter, a sign of Chris’ passage into adulthood and a story that people would tell until he was old. But today, in a world shrunk by social media, where fragments of stories travel like light and there is no protection from anonymous outrage, his achievement has been eclipsed by an endless wave of online harassment. Six weeks after his epic hunt, his mood was dark. He’d quit going to school. His parents, his siblings, everybody worried about him.
Had a good time talking to Alaskans with photographer Ash Adams last week for a Washington Post story about whether we’re worried about a threat from North Korea
Here’s how the story begins:
ANCHORAGE — There have been times in Alaska’s history when people have had deep anxiety about foreign threats. The state was bombed and two of its islands were occupied by the Japanese in World War II. And it is, after all, the closest anyone can get to Russia and still be on American soil.
But nobody here seems all that worried right now.
With North Korea’s test of an intercontinental ballistic missile last week, the news has been filled with speculation that a nuclear warhead could reach the Last Frontier and that Anchorage could be the most realistic U.S. target for destruction. But people here have been talking about the possibility of missile strikes for decades, and Alaskans tend to focus on more tangible hazards, like avalanches covering the highway, bear maulings at campgrounds, boating accidents and earthquakes.
“I’m worried about moose, not missiles,” quipped Anchorage Mayor Ethan Berkowitz. “Bears, not bombs.”
You know what sounds fun? Writing for hours with a totally friendly, no-pressure group of women on a beautiful Alaska island in the summer time without my children. Throw in delicious home-cooked food, some walks, maybe some art-making or a little yoga, too. I’m in! Are you?
This is a no-judgement, no-homework, nonfiction workshop focused on techniques that stoke creativity, build writing fluency, hone listening/editing skills and develop revision strategies. This workshop is well suited for creative thinkers who write or edit for work as well as creative writers and journalists looking for new ways to get started or reboot. Our work together is meant to help you think more clearly about your audience, better say what you mean, and find the most resonant parts of the story you are trying to tell. My big thing this year is having fun. LET’S HAVE FUN. Life is too damn serious.
And, I have two discounted openings for women who want to share skills, looking in particular for someone who might want to teach basic yoga and someone else who’d like to teach an art or craft related subject. For skill sharers the cost of two days of food, accommodations, writing instruction, and water taxi is $375. Regular rate is $435.
( Also: I AM TOTALLY MAKING T-SHIRTS. T-SHIRT COST IS $25.)
To reserve a spot, send me an email with dietary restrictions (and, if you want one, your t-shirt size) and pay by PayPal. (Find me at julia_o_malley@yahoo.com.) It’s first come, first served, but I’m happy to make a plan to pay half by July 4, and half at workshop time if you want.