Spent the day yesterday talking urban chickens with Blake Essig and Dave Brooks from KTUU Channel 2, who were filming segment for their “Road tripping” feature. (And we cooked dinner: this awesome recipe from the “Jerusalem” cookbook with harissa, yogurt, lemon and a fried egg on top.) Check out the hen’s 15 minutes of fame here. (That’s Barbara-Lyra, our bantam, there in Blake’s jacket, milking him for sympathy).
As part of my never-ending quest to be an adult, I’ve been trying to purge my home of wire hangers. It’s sort of an awkward struggle to throw away a hanger. They poke through the trash bag and when you bend them in half it doesn’t seem to make it any easier.
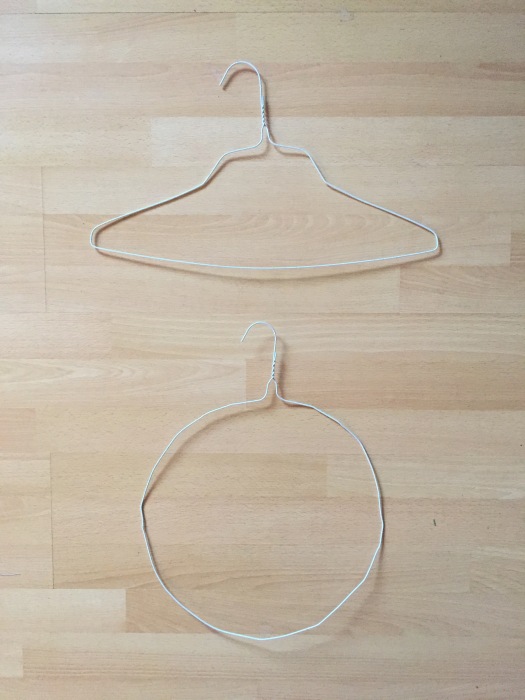
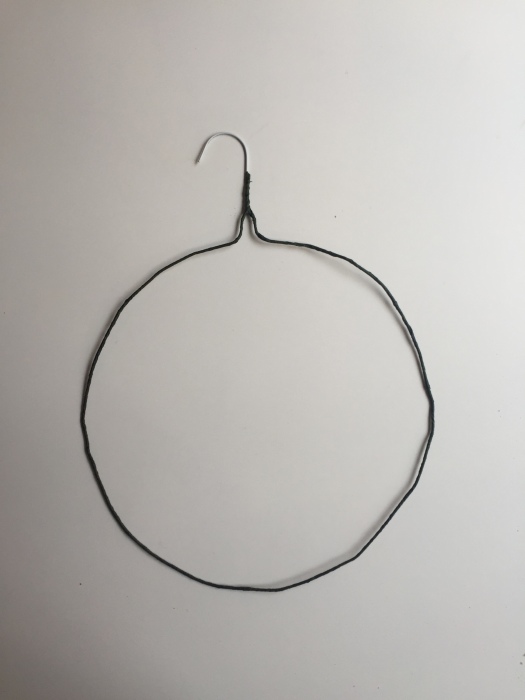
So today when I was tossing my recent dry cleaning hangers it dawned on me that I could easily convert one into a wreath base and, how convenient — there’s already a built-in hook!
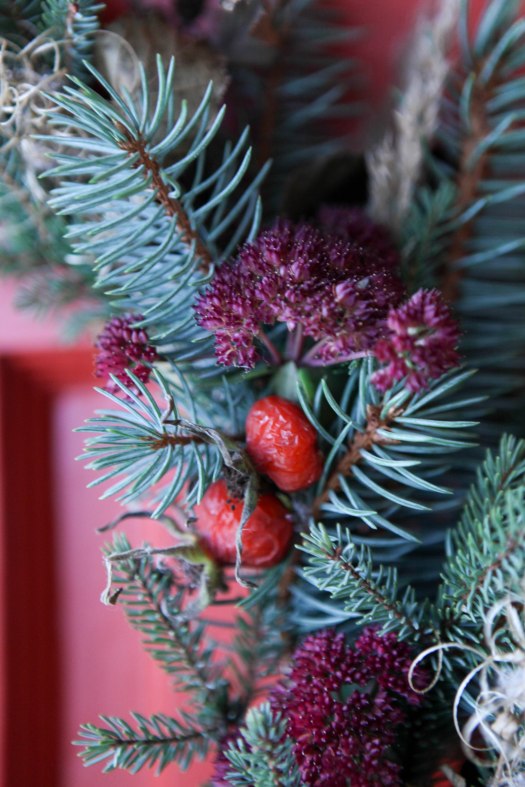
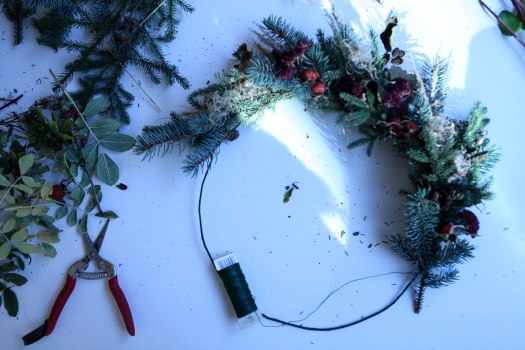
So I put on my winter boots and took a nature walk to collect twigs, plants and other dried-up pieces of nature to wire into a simple wreath.
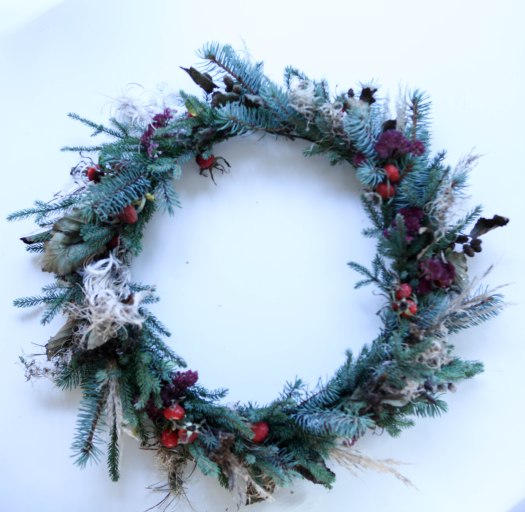
After completing my autumn wreath I was reminded why I’ve never been interested in wreaths: I have a hideous front door. It’s metal, it’s dirty and no amount of spruce boughs, berries or ribbon will make it look attractive.
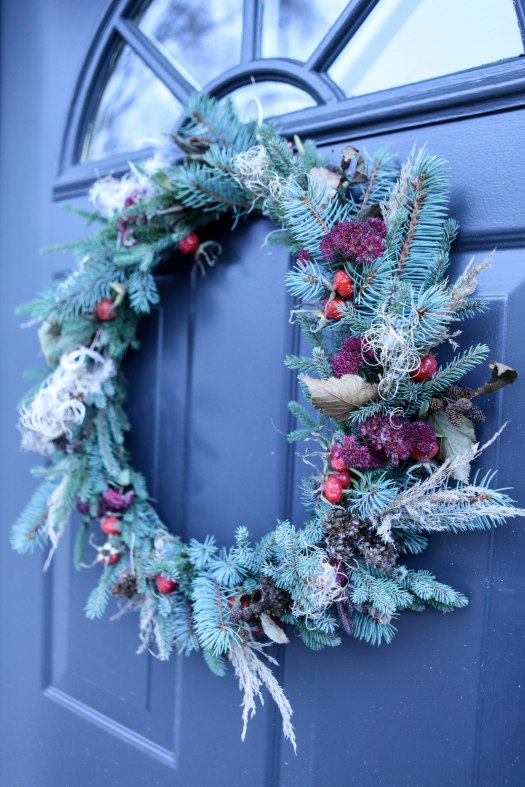
So I was stuck with a gorgeous wreath and no place to hang it. Thankfully, Julia has a beautiful front door just begging for a wreath to match.
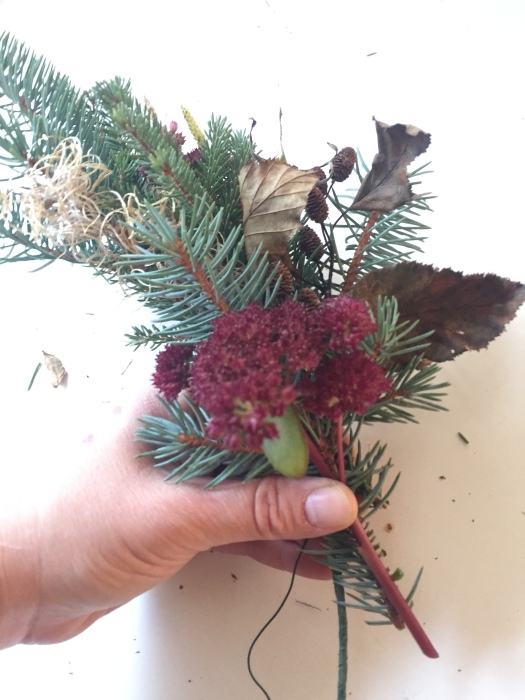
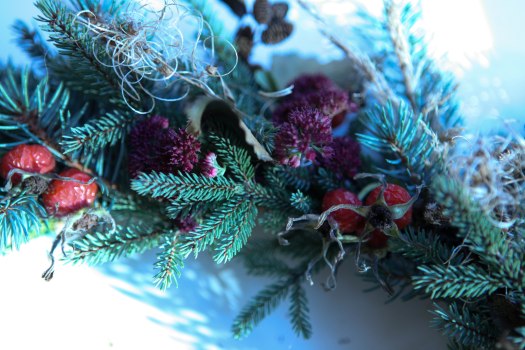
bits of dried-out nature such as spruce boughs, yarrow, alder cones, grass, rose hips and fireweed
scissors
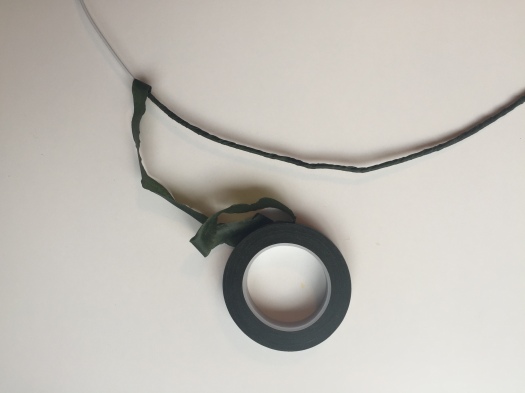
First, form your hanger into a hoop shape. Using the floral tape, start wrapping the hanger from the top twist, around and back so the only bare metal remaining is the hook. This will keep the greenery from sliding around and will camouflage the wire better.
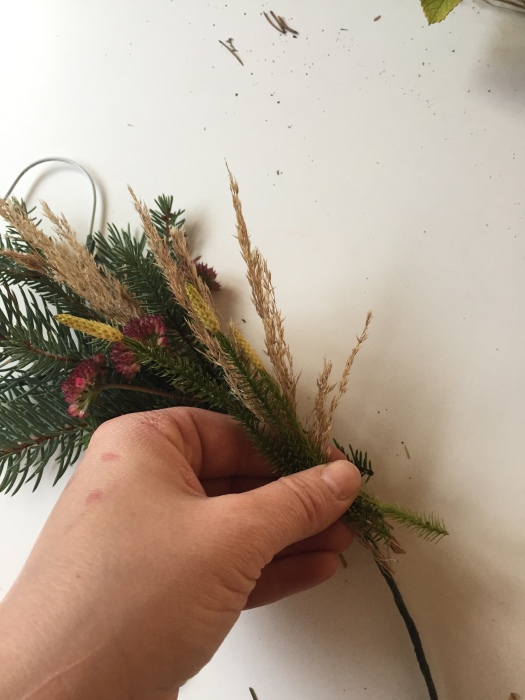
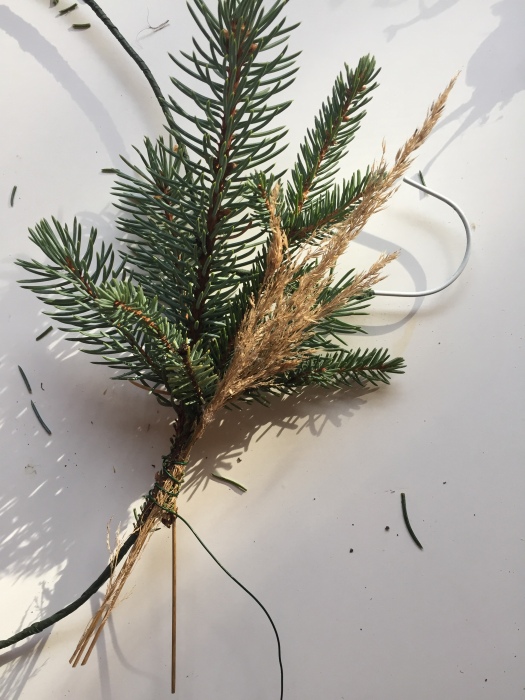
Take a small clump of greens, such as a sprig of spruce and some grass and cut the ends so there’s about two inches of stem. Place the clump at the top of the wreath base. Start wrapping the floral wire around the stems so they are securely fastened to the base.
Create another clump of greens and secure a little farther down the wreath base. Work your way all around the hanger until you’re back at the top. Hide the stems of the last clump behind the greens of the first clump and wire in place.
Now hang up your wreath on your picturesque front door and admire your crafty resourcefulness.
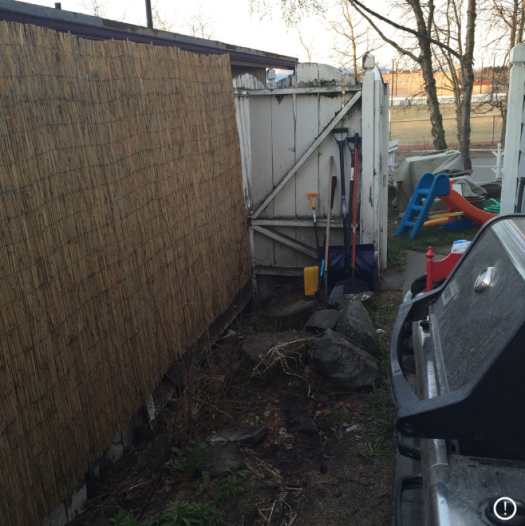
There were some things I wish I’d done differently when I negotiated the purchase of our old house. And, one of them was coming to an agreement about dealing with the totally dilapidated fence. Looking out the kitchen window was not a pretty sight:
Even minus the fence, the side yard was UGLY and full of stumps. Half a dozen trees had once been there! We live in a duplex, so there isn’t a lot of private space. We wanted to use what we had, but the existing yard was way too lumpy.
Here’s one more pic of what we were dealing with toward the front yard:
We were not flush with cash, but the fence really needed a fix. Last spring, we brought in a stump grinder and took out the stumps. (That was crazy and violent and satisfying and I wish I’d filmed it.) Our neighbors pitched in for supplies and I called in my little brother Joseph.
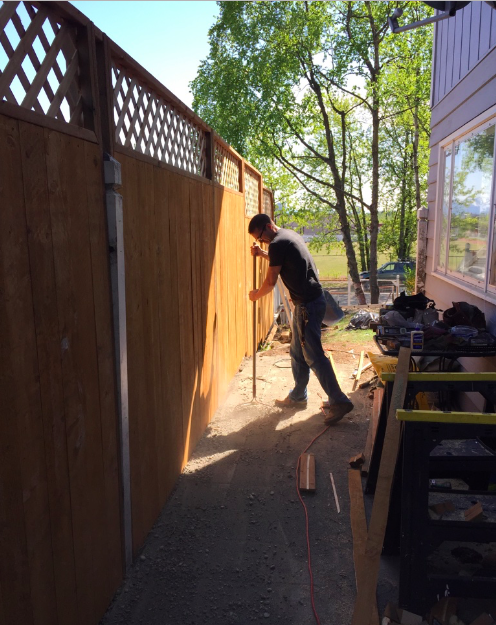
He tore down the fence (all except a one still-sturdy, if a little crooked, post #brotherlogic) and put in new pilings. That was no small task.
We gave the old weathered wood to some friends. Some of it became a chicken coop and some became the sign that is now on the front of South Restaurant.
Awww, look. There’s Joseph with then-baby Neri.
We wanted privacy, but to let in some light. We decided to go with an 8-foot fence made of treated wood with lattice at the top.
It got a little hairy because the old fence was built on a retaining wall. But Uncle Joseph figured it out:
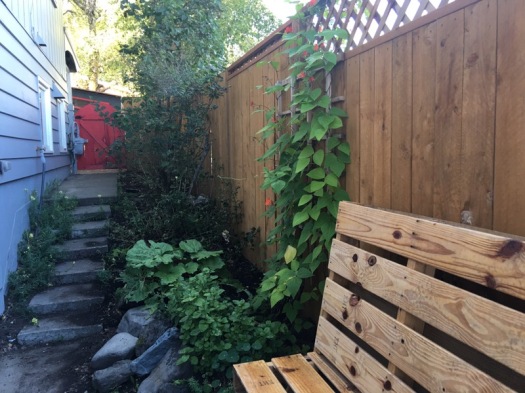
Where the stumps had been, we used sand and pavers to make a patio.
It turned out great. That’s the old gate that I spray-painted and replaced the hardware.
(Don’t look too hard at the dirt the chickens scratched onto the stairs….)
I planted mint and rhubarb and waited all summer for this dang beanstalk to bloom. A super cool plant.
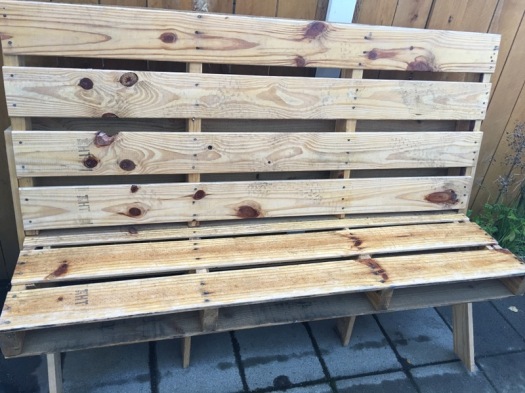
I found the pallet bench at the home consignment store on Fireweed Lane.
It’s a little uneven when you sit on it, but that kind of goes with our general aesthetic. (Not pictured: my dirty old grill. Though it looks much more dignified in its new environs)
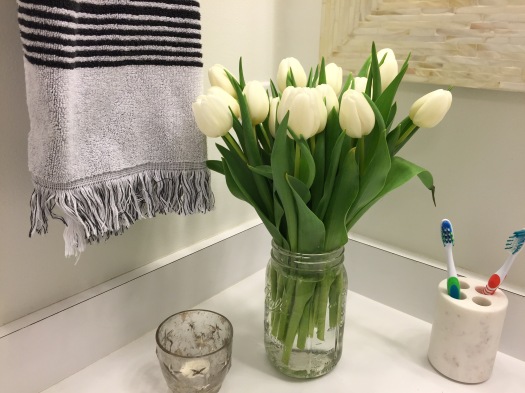
We’re gearing up for spring here in Anchorage and although I don’t have time for spring cleaning, the least I can do to spruce up our home is to shove fresh flowers in a vase.
Since Mother’s Day is the next floral holiday on the calendar (and often the busiest day for florists) I thought I would share a step-by-step tutorial on how you can make your own flower arrangement. Whether you’re a son, a daughter or a DIY bride, this should be helpful for anyone who is looking to be florally frugal.
If you’re in Anchorage, you can purchase beautiful greenery by the stem at Alaska Wholesale Flower Market. They range from $1.89-2.99 a stem. They also have gorgeous blooms there, but in an effort to save money I purchased grocery store flowers using a buy one, get one half off coupon.
DIY flower centerpiece
What you’ll need for this particular arrangement:
4 alstroemeria stems
5 football mums
4 baby’s breath stems
1 seeded eucalyptus branch (with at least 4 smaller branches)
1 baby eucalyptus branch
one medium vase
a roll of 1/2-inch transparent tape (purchased at Fred Meyer)
garden shears or scissors
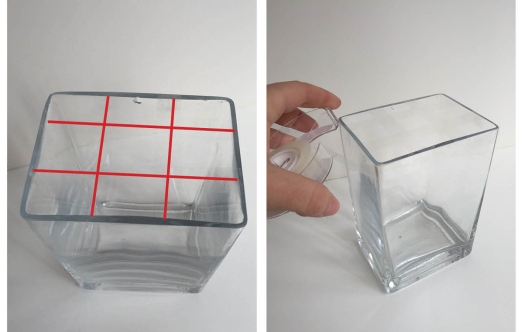
Step 1: Create a grid of tape across the top of the vase. There should be nine quadrants in the grid. To keep the grid from breaking while arranging, wrap tape around the top edge of the vase two times.
Step 2: Fill your vase with water and if you have a little nutrition packet, pour that in.
Step 3: Start with your seeded eucalyptus. Trim small branches off the main branch and arrange them around the vase. I try and put the droopier branches in the front to cover up the rim of the vase. If you cover some of the rim it will give your arrangement more flow.
Step 4: Now add baby’s breath to the arrangement. Not only is this good filler but it also gives your arrangement some structure so the other blooms will be better supported. If you’re not a fan of baby’s breath, waxflower is a beautiful substitute.
Step 5: Find your most stunning chrysanthemum. You’ll use this as your focal point. Trim the stem at an angle and remove any extra leaves. Determine where the front of your arrangement will be and place your mum a little off center and facing toward you. Then trim and add two more mums, turning the vase around as you place them so it can be enjoyed from all angles.
Step 6: Break the leaves off the alstroemeria stems and cut the stems at an angle. Start filling in the gaps of the arrangement with the alstroemeria. Look at the arrangement from a bird’s eye view to determine where these gaps are. Nestle in these blooms so they are tucked nicely into the arrangement.
Step 7: Trim small branches of the baby eucalyptus and place them here and there in the arrangement to fill it out and cover any gaps.
Now place your arrangement in a spot that brings you joy, such as the one moment your dining table is clear of debris.
The original ’60s upstairs bathroom in our house was, compared to everything else we were dealing with, not too bad. It was done in cream and a mauve pink color. The wall-mounted toilet was pink and so was the tub. It had two sinks with brown floral designs inside. One of them was specialty sized for hair-washing. And look, an intercom!
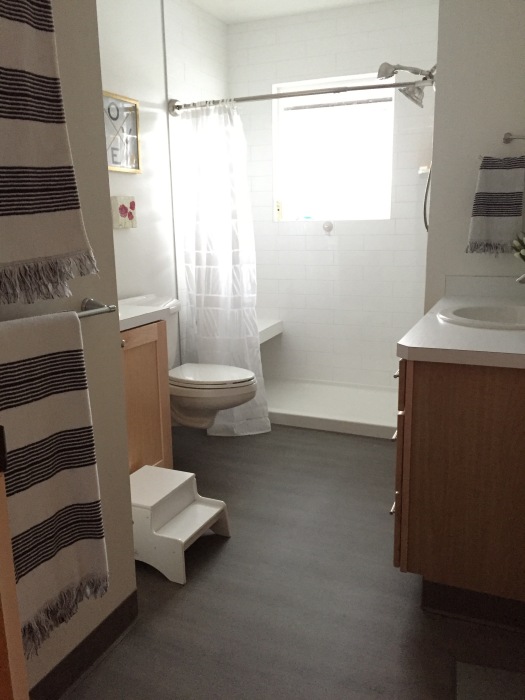
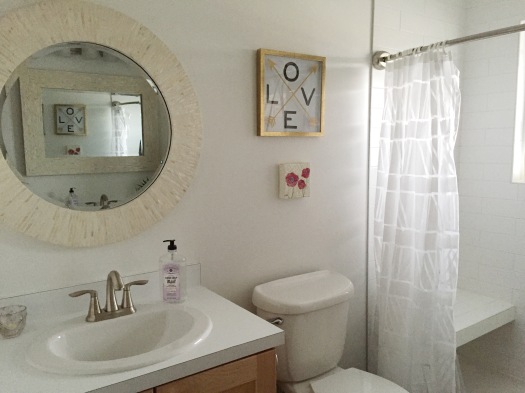
The plan we had for how we were going to use the upstairs part of our house called for a roomy bathroom that could accommodate a family with little kids. Working with contractor K&W Interiors and designer Fernanda Conrad, we gave it a simple, functional makeover:
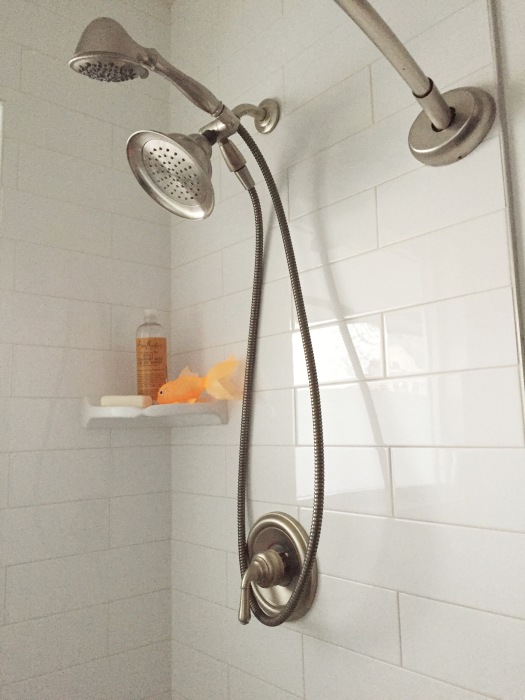
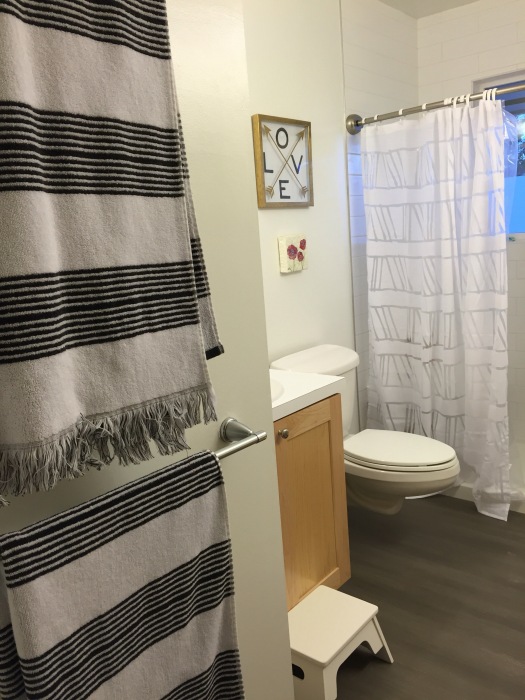
The biggest thing we did was replace the bathtub with a shower. We used a pre-made shower pan and white subway tile. There’s a small bench and a corner shelf. I found the double shower head at Bed, Bath & Beyond.
Here’s the view from the shower. I used film on the lower half of the window so we wouldn’t flash anybody:
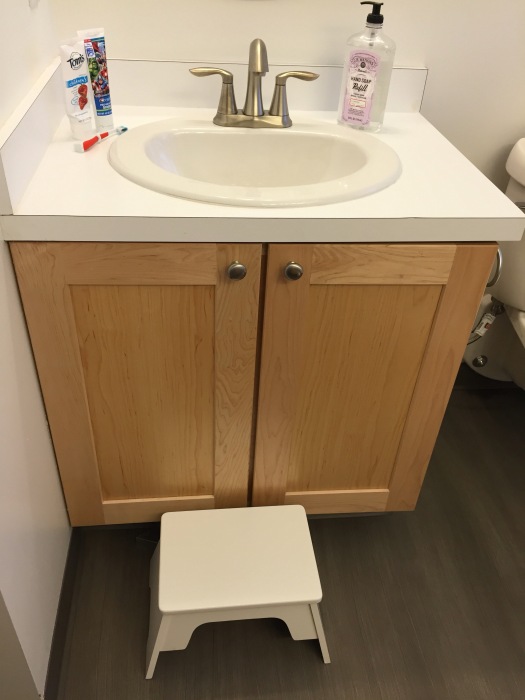
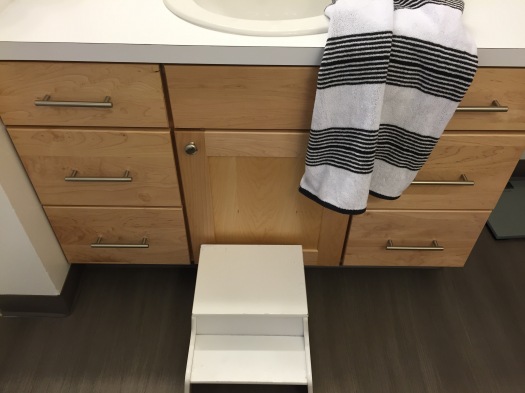
The double sink plumbing set-up allowed for two new vanities, a kid one and a larger adult one. We went with basic shaker in hickory, with white laminate tops and basic white sinks:
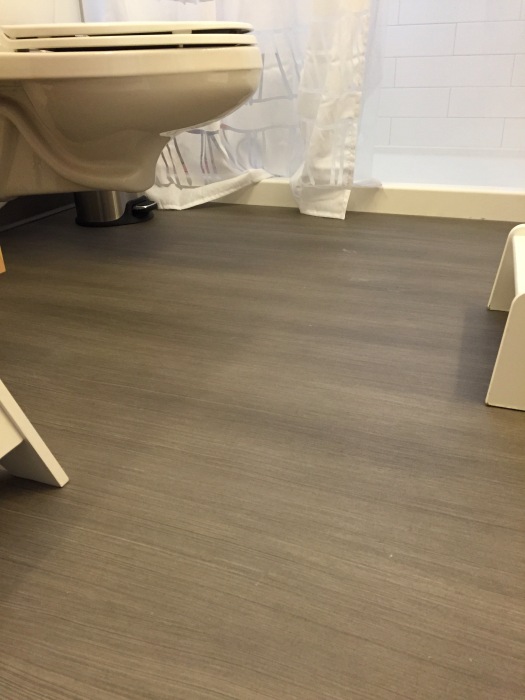
We painted the room brilliant white. We replaced the fan with a quiet Panasonic version and replaced the window in the shower. I found a new wall-mounted toilet (More about the toilets in this post about our downstairs bathroom) We replaced the floors with this brushed grey vinyl that Fernanda found.
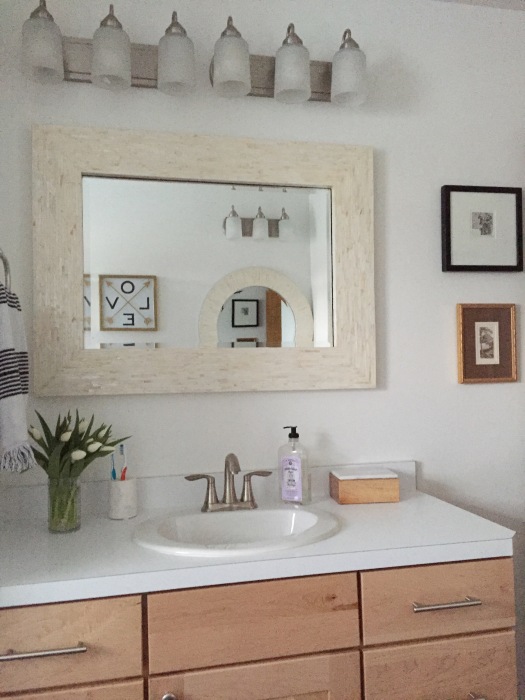
The light fixtures, which I don’t love but don’t hate, are from Lowes. (Light fixtures for vanities are so hard!) I found the mother-of-pearl mirrors at Pier One.
The towels and shower curtain are from the adorable Nate Berkus Target line which was just on sale. The marble vanity accessories are Target as well.
This guy, who needs a shower, can’t wait to mess this bathroom up. (Yes, he is dipping a quesadilla and a sausage link in his smoothie):
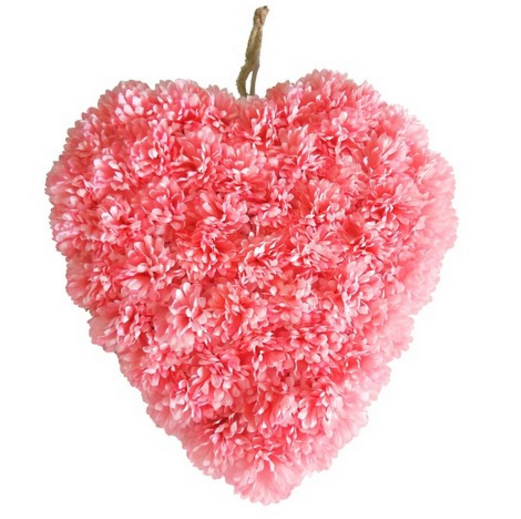
I liked it. I wanted it. A person this time of year in Alaska has to take the festive springy-ness where they can get it. But the price tag, $20, seemed steep. Especially since I have two front doors at my house because it’s a duplex. Forty bones for fake flowers seemed much. So I texted craft whiz Natasha Price of Alaska Knit Nat to see what she thought.
“Can we make one of these for less than $20?”
“We can try.”
Faux flowers aren’t cheap. But, it turns out you can make one of these for less. In fact, you can make a COOLER one for $10 to $15, give or take.
Here’s how we did it:
First step, I’ll hand this post over to Natasha. She says:
Fake flowers can often be just as pricey as fresh, but with a little coupon clipping, iPhone app knowledge and sale timing you can purchase silk flowers on the cheap.
I first checked Bishop’s Attic thrift shop. They often have silk flowers for a fraction of the cost of new ones but we needed a hefty quantity of blooms.
So it was off to Michael’s, kingdom of fake flowers. I looked for blooms that didn’t stick out much (e.g., rose buds or tulips). The flowers I purchased were originally $4.99-7.99 a bunch, with about seven blooms on each bunch. You’ll need about 40-50 blooms per heart, so we needed roughly 150 blooms.
I purchased the flowers when they were 50 percent off. Michael’s often has sales on flowers so if they are full price, wait till the next weekend to see if they go on sale. I also used the Michael’s app and a mailer coupon where I got 40 percent off one item and 20 percent off all non-sale items. I ended up spending $45 for plenty of flowers for three door hangers.
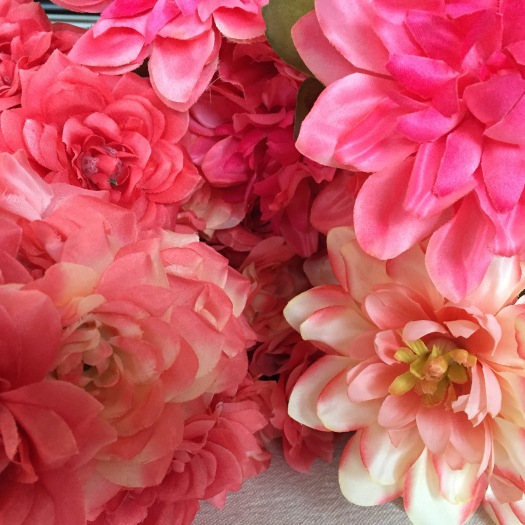
Natasha chose an array of pinks:
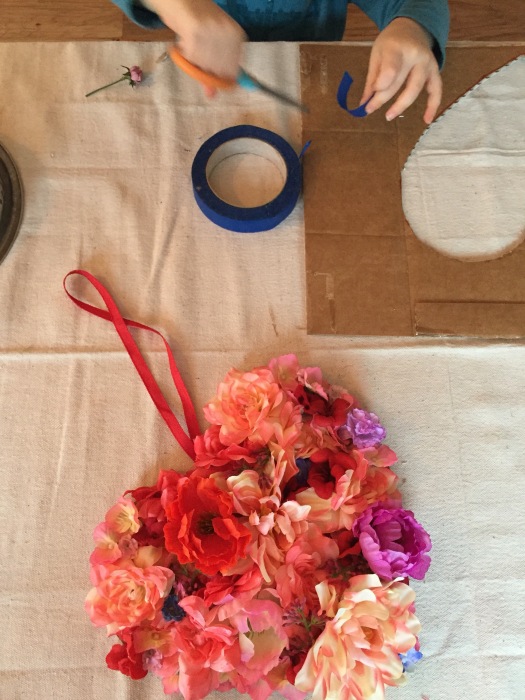
Next, assemble your supplies. You will need: scissors, wire, ribbon, cardboard, newspaper, a marker, masking tape, a hot glue gun and lots of hot glue sticks. Optional: X-Acto blade, cutting mat, wire cutters.
Natasha Price photo
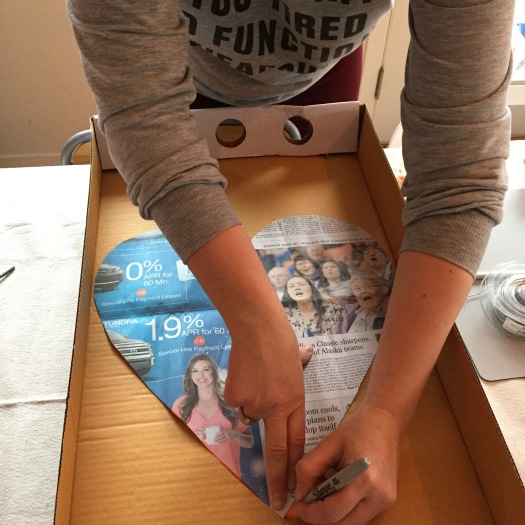
You want to make a template for your heart. We each drew half a heart on a piece of folded newspaper and then unfolded it. We chose the one we liked best, touched it up a little with scissors and used it as a pattern:
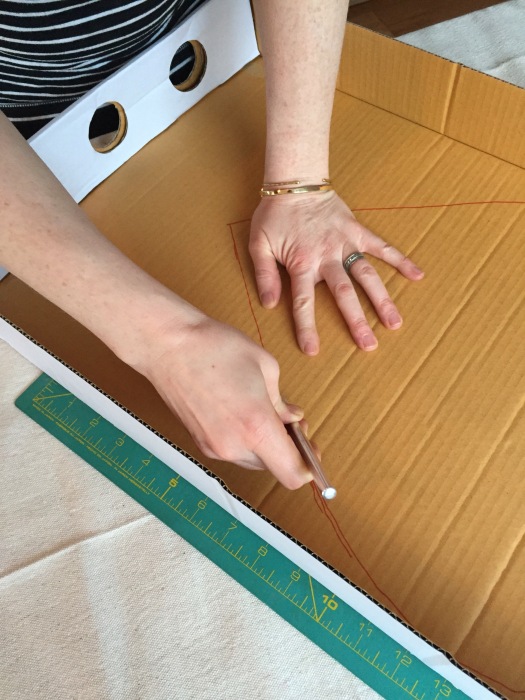
We placed it on a piece of cardboard and drew around it:
Then we cut along the line (being careful not to accidentally carve into the table):
Natasha Price photo
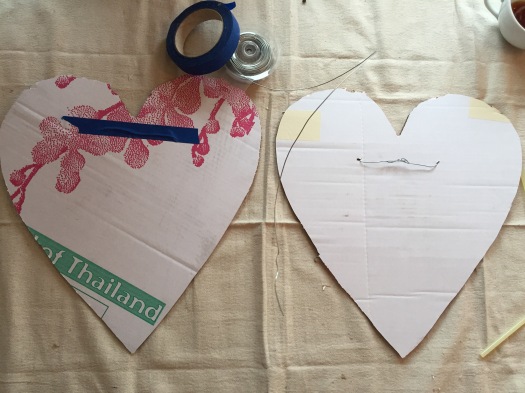
We made two for my doors and Natasha made a smaller one for her office.
We threaded wire through them and taped it on the front of the heart to make it flat. That way, we’d have a place to tie the ribbon.
Natasha Price photo
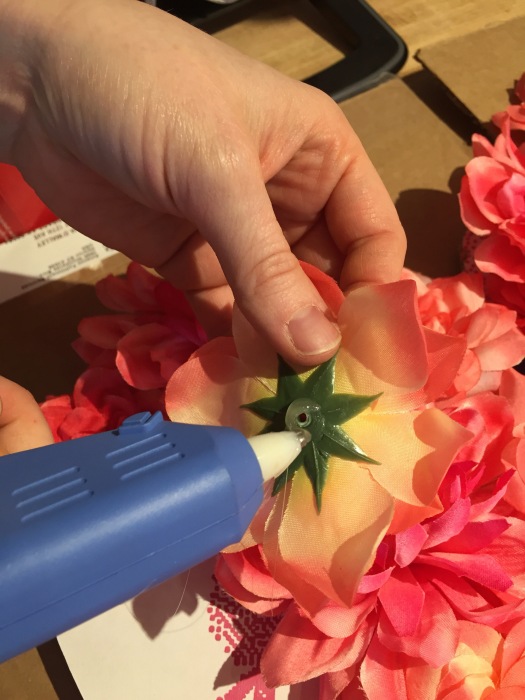
Next, Natasha pulled the flowers off their stems and snipped off any part on the backs of the blossoms that would make them hard to glue flat. Then we arranged flowers on the first heart to give a sense of how it would come together. And, then, we started to glue.
Natasha Price photo
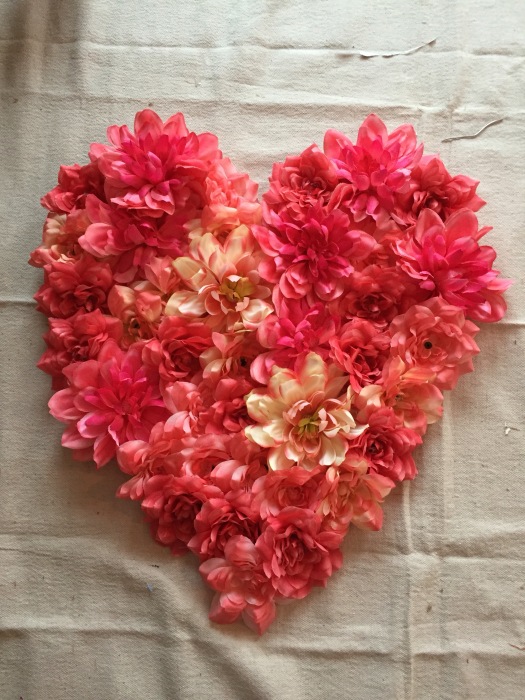
We experimented with each heart, changing the ratio of large to small flowers. Here’s the first one:
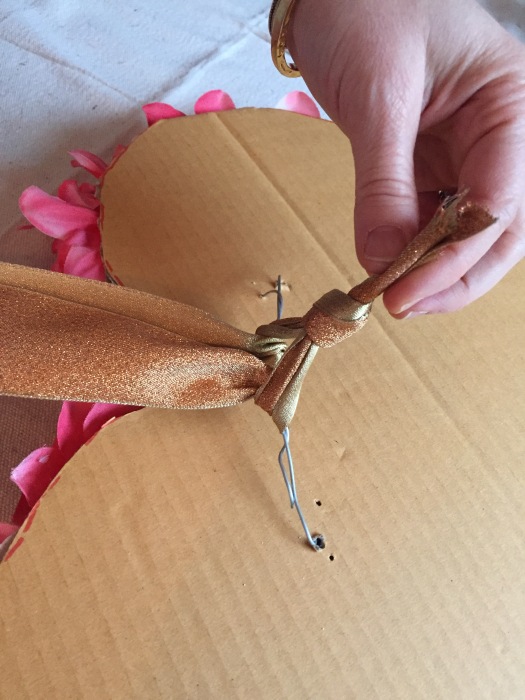
Once we finished putting the flowers on, we chose our ribbon.
We threaded the ribbon through and looped it around the wire.
Natasha Price photo
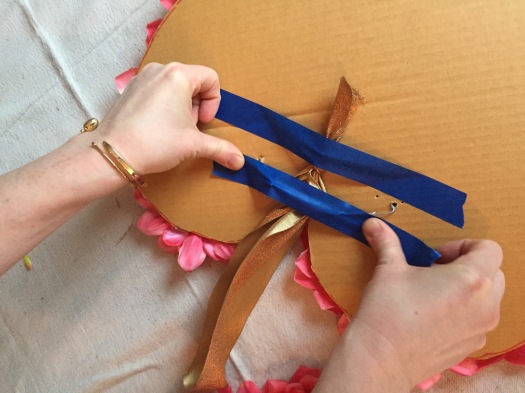
Then we secured it with tape.
Natasha Price photo
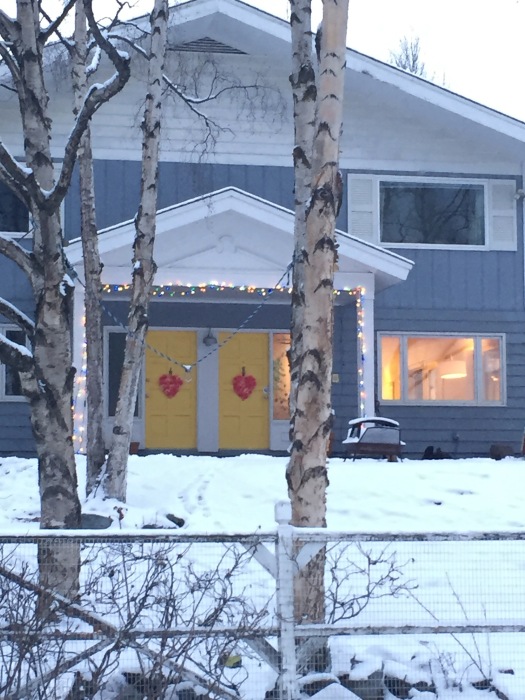
And there it was (That’s Natasha’s. It’s gorgeous):
Natasha Price photo
And here are my front doors, giving winter (and Target) the flowery finger.
I’m going to admit something: I can’t keep up. I’ve got two kids under five, a relationship, a real job, a couple of semi-real jobs, four chickens and a big old house in need of many repairs. Before children, I worked at it but I identified as an organized person. Post kids, I spend a lot of time just getting by. There is always more laundry to fold, a sticky handprint to scrub, crumbs in the couch. Matching socks? Please. For whatever reason, the chaos seems to concentrate in a particularly overwhelming way on the section of kitchen counter where I cook. The mail. All the various electronic items that need to be charged. Toys. Office supplies. SO MANY DAMN CORDS.
One day as I was trying to chop some onions amid all the mess, I started day-dreaming about building another place for all of it. A place where phones could charge without getting food on them and mail could be organized, or at least out of sight. I wanted the equivalent of the old school telephone table, except upgraded for the iPhone world. The only problem was that our house isn’t large. A piece of furniture wouldn’t really work.
Old school telephone table:
While we’re at it, I’ll take a concerned-looking maid, too.
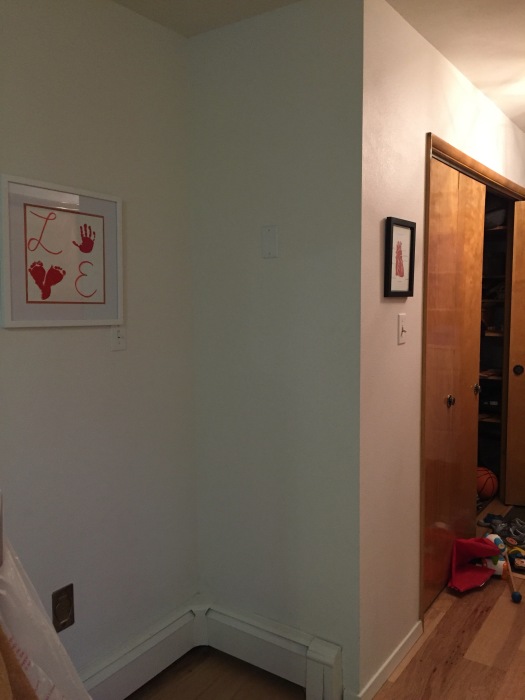
Then I noticed that there was this old, covered electrical socket high in the wall at the bottom of the stairs. It had been installed in the 1960s to power a plug-in clock. And there was kind of a roomy landing area. What if I used the socket at the bottom to build a new-school telephone table? A charging spot for phones and computers and tablets. A place to put the shopping list. A mini island of organization. A mother’s control center. I liked “mother” and “control center” in the same sentence.
Here is the spot. If you look close, you can make out the socket cover on the wall:
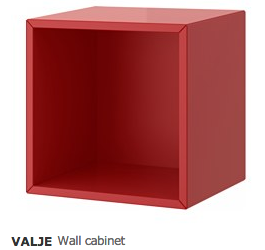
Next step was to find some cabinets. I wanted it to be inexpensive but also cool. (Hahahaha…) Over Thanksgiving, I visited IKEA in Seattle and settled upon some components of the VALJE series. The key was that the cabinets and drawers were shallow so they didn’t take up too much space. (The experience at IKEA, I might add, was far better than my previous IKEA experiences. There was a shipping desk at the store with a staff person to help get things to Alaska. And I used Lynden as my shipper. It cost $100 to get the stuff to Lynden (as opposed to $50 for local delivery). But IKEA managed everything and it went really smoothly. More on IKEA shipping here. )
Here’s what I bought:
I settled on two red box shelves:
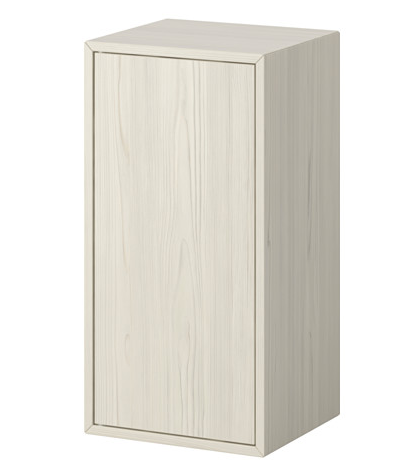
Two cabinets, in white larch:
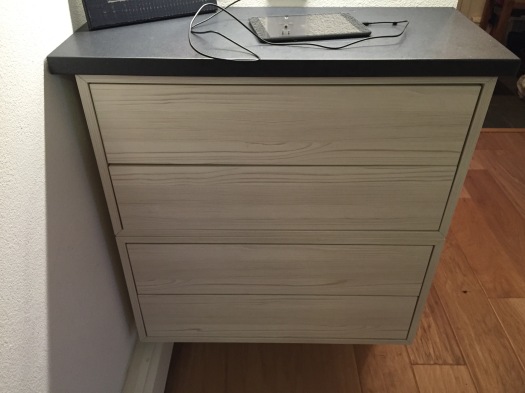
And two sets of drawers in white larch (pictured here in mocha):
Once they arrived, it took me a couple of weeks to get the time to put them together because I had to do it sans kids. Of course it was tricky. There was one particular step involving sliding in the back panel that just kept going wrong. I was saved by googling the name of the piece furniture and the problem. That took me to a forum where I found out what I was doing wrong. (Side panels were not identical and had to be put on a certain way) After that, it was easy-breezy. Okay, except for one tiny, missing, essential part. But I called and IKEA sent it to me.
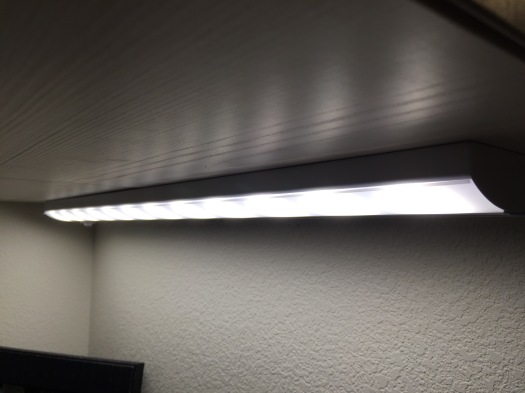
Once I got the pieces assembled, I decided to call my carpenter friend Dan Slattery to do it. I could have hung them, but I don’t do electrical. I put the top of the drawers at counter height, out of reach of children. Dan fished the electricity down from the old clock outlet, wired in an LED under-counter light and put in a sweet USB socket.
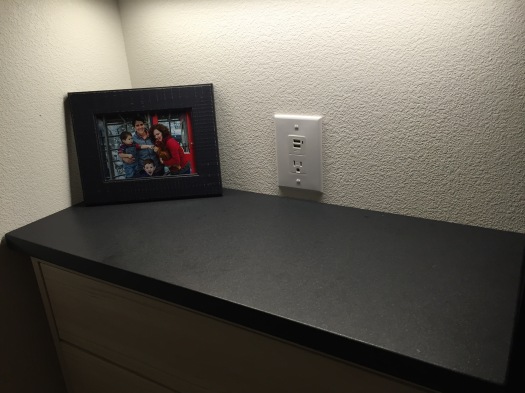
Next I shopped around at some local solid-surface places for a piece of remnant fancy counter-top. I fell in love with this sliver of dark grey quartz. (I think putting the countertop on dresses the whole thing up so I get to call it an “IKEA hack.” )
Even remnant quartz isn’t cheap. A suitable substitute would be butcher block. In that case, you could situate the plug in the back of the top drawer and feed the cords through a hole. Even tidier!
The top shelves gave me a place for the cookbooks I had left once I culled them using the KonMari method.
One of the benefits of the IKEA pieces was that I could afford drawers. The top one is where I hide all the mail.
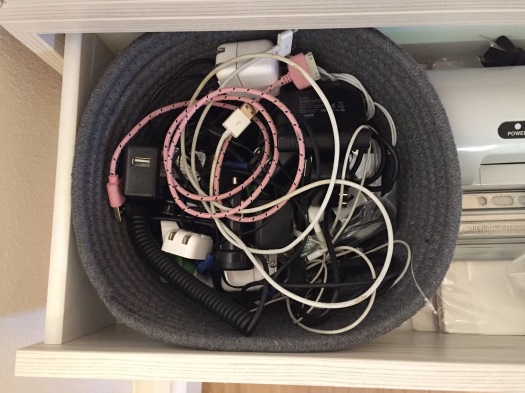
And, look at this satisfying cord situation. (Plus that’s my laminator. I love lamination.)
And now, when I cook, there are approximately 50 percent fewer random items in the way. I’m all for simple victories.
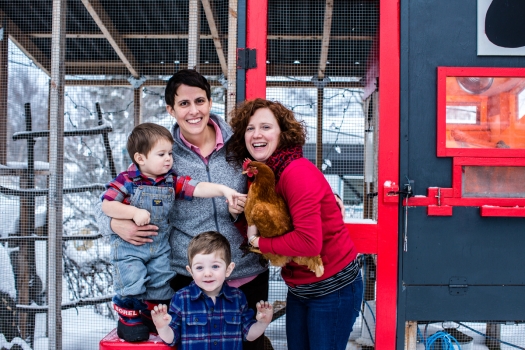
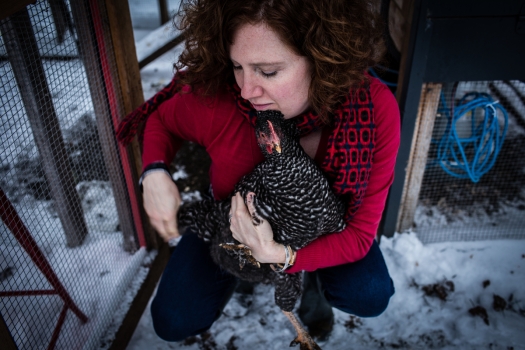
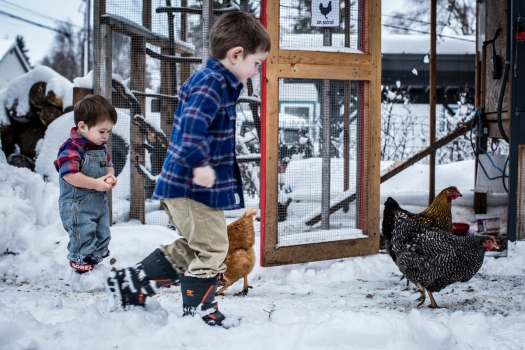
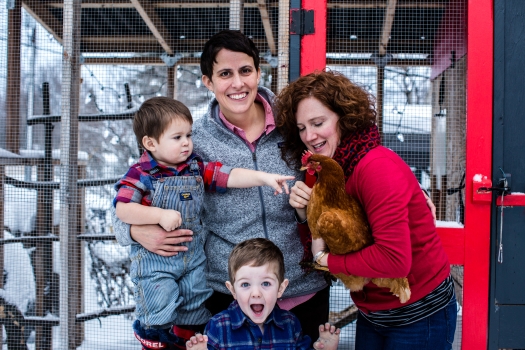
I can’t believe that a year has passed since our last family photo! Over the year, we’ve added some chickens to the mix. Naturally, they are the stars of this year’s holiday shoot with our dear friend Ash Adams, who has such a great sense of humor and a way with kids. Leo named most of them after his favorite movie, Big Hero 6. They are Hiro, Bamax, Tadashi and, for reasons I can’t explain, Bubba. (That’s Bubba in our family photo. Her little comb has some frostbite on it, poor girl. I’ve since improved the coop heat situation.) Neri, who is up first in the morning and has been collecting the eggs with me, calls them “Bok Boks.” That name has kind of stuck.
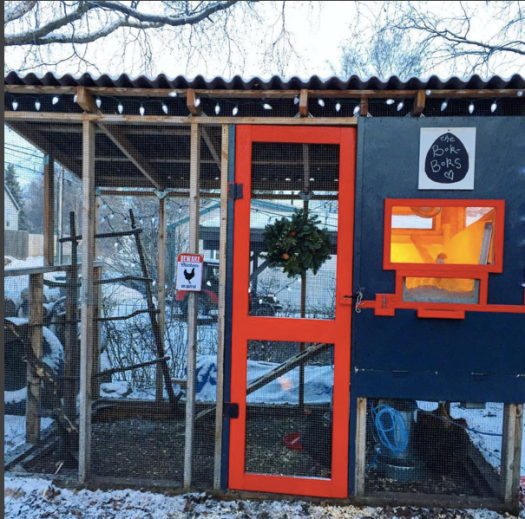
Here’s their coop, which we were lucky to inherit from some neighbors who had it in their backyard but didn’t have chickens (thanks!). It’s all decorated for Christmas:
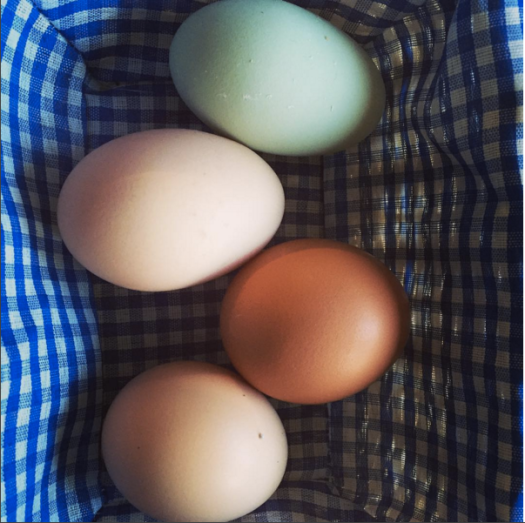
Eggs, top to bottom, belong to: Bamax, Tadashi, Bubba, and Hiro.
They have been way more fun than I expected. And the fresh eggs are great. I love giving them to friends and family almost as much as I love eating them.
Anyway, thanks Ash, for these great photos:
Little Neri, age 17 mo.There is chicken poo on my boots.Hiro, looking glam. My mutant hand.I let him hold the eggs. It doesn’t always end well.Leo, age 4.
This is kind of my favorite photo.No, maybe it’s this one.
I’ve got the holiday spirit. Bad. And it’s all thanks to our 3-year-old son. Seeing his little face light up at every holiday detail fills me with warmth and joy. We turned on the car radio the other morning as little Michael Jackson was belting out “Santa Claus is Coming to Town.” Jack was giddy and screamed, “We sing this at preschool! I know this song!”
The magic is real and I want to be a part of it.
Here are some ways we’ve been keeping the holiday spirit alive in our Anchorage household. Share yours in the comments!
1. Portable North Pole
A friend told me about Portable North Pole, a free online program where you enter a few generic bits of information about your child, what you’d like him to work on this year (we went with “brush teeth every night”) and a photo. In a few minutes you have a personalized video message from Santa.
Our son Jack was stunned when he watched it. He made us replay it four times. Let the Christmas joy begin.
2. Get into the kitchen
Our preschooler loves to help out in the kitchen. At Thanksgiving he helped me make pumpkin pie and it was a kitchen bonding experience. He measured the flour, cracked the eggs and turned on the mixer.
Whether it’s Christmas cookies or candy cane bark, there’s plenty of ways to get your kids culinarily involved.
3. Donate to a local shelter
Each year Bean’s Cafe, a local homeless shelter, turns to the community to help out with Beanie Boxes, which are wrapped shoeboxes filled with necessities such as deodorant, toothbrushes and socks. Have your child help you fill up a shoebox with goodies, pick out the wrapping paper and ribbon and drop it off.
This year we collected items for AWAIC, the local women’s shelter. I made a list based on what they asked for and included little clip art pictures of each item to make it visual. Jack and I went to the store and he selected three items from the list to donate.
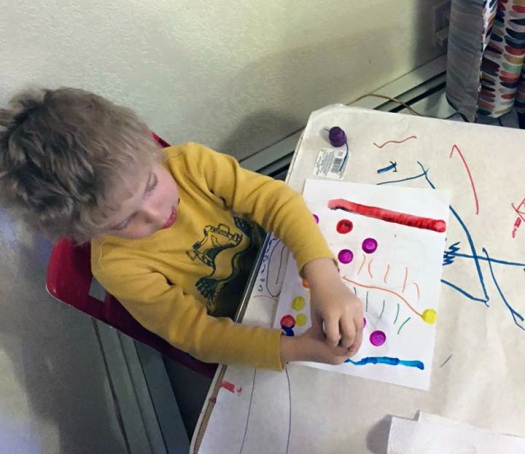
4. Felt Christmas Tree
This is a project I put together two years ago, but it’s still fun to play with. Buy a couple of yards of green felt and cut out a tree shape. On several different colors of felt draw some simple shapes and have your child cut them out to create ornaments. Pin the tree to the wall and let him decorate his tree to his heart’s content.
Up till now we’ve avoided taking our son to a movie theater. I remember being a non-parent and cursing the world whenever a screaming kid was seated at our movie.
Thankfully there are kid-friendly options. We recently took Jack to Williwaw where they were showing a kid-themed Christmas film as a fundraiser for Special Olympics. It was Jack’s first movie theater experience and a positive one. The manager passed out free popcorn and families roasted marshmallows over a s’mores kit.
Williwaw has several more movie nights planned. There are two show times so you don’t have to worry about staying out past bedtime. Plus it saves you a night of having to cook dinner! Click here for show times.
If you can’t make it to Williwaw, there’s always the peanut gallery at Bear Tooth Theaterpub. Tickets are cheap and if you catch an early show you don’t have to feel bad about making noise in the balcony area.
6. Make snowflakes
Many tiny tots are hard at work on their fine motor skills. Ours loves cutting out paper. Work on making paper snowflakes together. Jack was happy with just cutting up pieces of paper and taping them to the window. We’ve got sort of an abstract impressionism vibe going on.
Here’s a simplified way to make paper snowflakes that is perfect for new scissor users.
Every year the Hotel Captain Cook sets up an elaborate gingerbread house village in their lobby. Check out their live gingerbread web cam to catch a glimpse.
Afterwards, head the the store for some graham crackers, powdered sugar, gumdrops and Necco wafers and build your own.
8. Write holiday cards
I’m a big supporter of snail mail. Have your child help you with your holiday cards by including their scribbles and drawings. Jack actually drew a Christmas tree for his preschool teacher, so that definitely was included.
9. Look at the lights
Kids tend to love sparkly things that light up. Thankfully it’s dark most of the time here right now so it’s easy to find trees and houses adorned with twinkly lights. Start off at Town Square Park, which has some of the most stunning blue lighted trees.
If it’s not too cold, take a stroll through the Alaska Zoo at their evening Zoo Lights event. All the pathways are illuminated by animal-shaped light fixtures, some of which are animated. If you’re lucky you might spot a real, non-napping animal.
This week, Jack rushed inside after school to tell me his wish finally came true: the shooting star was on. A house over on Elmore and Huffman has a tall pole that lights up to the rhythm of holiday music that you tune to your car radio. Jack’s been waiting for it all year; and it’s free!
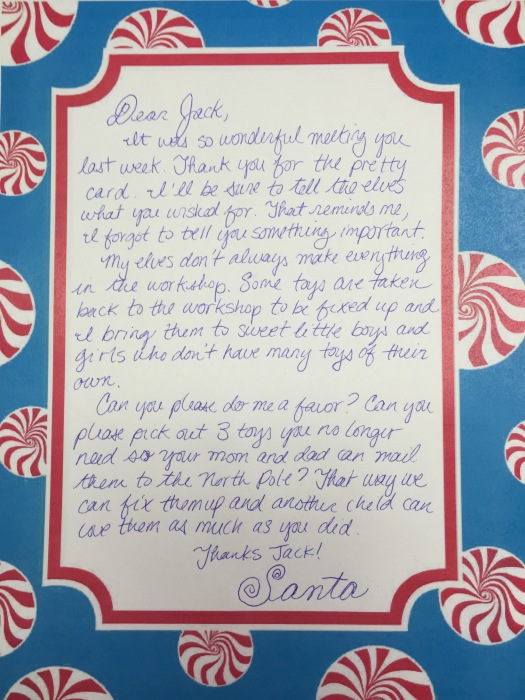
10. Have Santa mail a letter
Ok, this one is a little manipulative, but I had to give it a try. We have started a tradition in our family that in order for Santa to deliver toys to us, we have to give toys away to someone else who needs them. Instead of boring old parents telling their children to give away their toys, why not have Santa ask?
Santa mailed Jack a letter explaining that sometimes the elves fix up old toys in the workshop to give to other kids who don’t have many things. It worked like a charm. Be sure to put the correct return address.
It’s official. We have snow, darkness and along with it the holidays have begun! It seems that Halloween officially kicks off the season and we suddenly have a plethora of places to be, events to attend and holiday traditions to share with friends and family. I’m a fan of entertaining, especially at home. Here are some tips for creating your perfect holiday soiree.
Keep it simple (fairly) – Whether you’re preparing a dinner party for 8 or hosting 40 guests for hors d’oeuvre it is best to keep it simple, somewhat. It isn’t fun for anyone when the host or hostess is stressed out over having the perfect napkin fold or the right color of wine to match the table settings. I find that the most enjoyable gatherings are when your host has put some thought into making a few finishing touches unique, like a personalized place setting, but the event still feels relaxed and all walks of life feel welcome. My recommendations are using local and reusable ingredients as decor. Seasonal produce like kumquats, clementines, pomegranates, persimmons and squash all make a wonderful statement as a part of your tablescape (and you can eat them in the days that follow). Go outside and clip greens right out of your backyard and use them to fill the space on your table. They smell wonderful and last for days!
Use darkness to your advantage – I crave the darkness because all summer long at events I don’t ever get to use candles or ambient lighting! Now that it’s dark, pull out all of your heirloom candlesticks, pillar candles and even string lights to create a warm glow inside your home. Alaskans equate darkness with winter and there’s nothing more romantic than candle light during a dinner or a holiday party. Keep in mind a little goes a long way. Don’t go overboard.
Cherish tradition – Does your family or partner’s family have traditions for the holidays? If so, share these with one another! My husband is Scandinavian so we make (or attempt to make) lefse and a German springerle cookies. His mother has a cookie stamp that is over 100 years old! My father is from New England so we always have clam chowder on Christmas Eve and we open one gift that night. Or maybe you celebrate Hanukkah or Winter Solstice? Traditions are important and they enrich our lives by creating lasting memories. Pick two or three that are the most important to you and stick with them.
Food IS a decoration – Food is beautiful. Especially bright produce and desserts! There’s nothing anyone likes better than walking into an event that has a sensational display of hors d’oeuvre or sweets. Let your food speak for itself. After all, it has so much to do with who we are and it’s a great conversation piece. If you prefer an eclectic look use a mismatch of heirloom pieces and patterns for vessels. If you like a sleek or clean look use solid colors like white and cream ceramic vessels to display your treats.
Shop Locally – The holidays are a great time to support small businesses. Local products are also a great ice-breaker and they tend to spark conversation. Buy cheeses from a locally-owned purveyor. They’ll help you pair them with the wines you’ll be serving. Stop in at a spirits store and show them your menu. They will happily help you pair beer, wine, sherry or whatever you fancy to complement the meal. Pick up hand-made chocolates or truffles to add to your desserts table. Splurge and buy one large or a few small centerpieces from a local florist to give your table that extra something. People will take notice and appreciate these little touches.
Here’s more photos that we put together for inspiration:
Erin is an Anchorage event planner and designer who also enjoys all things entertaining. For more tips and ideas, visit Blomma Designs.


 Our preschooler loves to help out in the kitchen. At Thanksgiving he helped me make pumpkin pie and it was a kitchen bonding experience. He measured the flour, cracked the eggs and turned on the mixer.
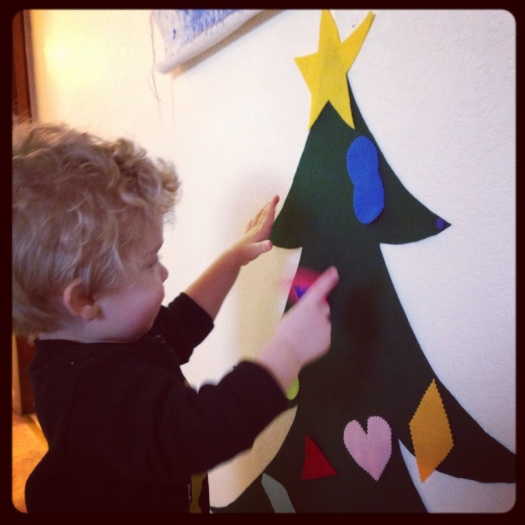 This is a project I put together two years ago, but it’s still fun to play with. Buy a couple of yards of green felt and cut out a tree shape. On several different colors of felt draw some simple shapes and have your child cut them out to create ornaments. Pin the tree to the wall and let him decorate his tree to his heart’s content.
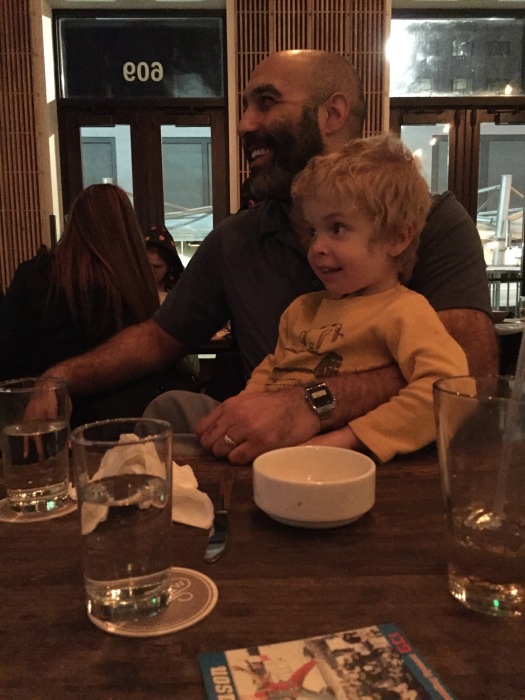 Up till now we’ve avoided taking our son to a movie theater. I remember being a non-parent and cursing the world whenever a screaming kid was seated at our movie.
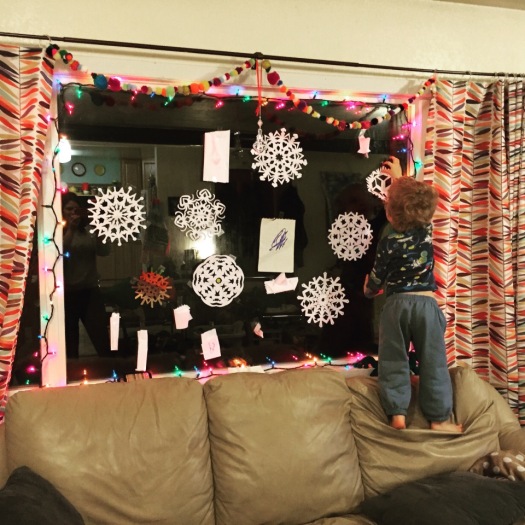 Many tiny tots are hard at work on their fine motor skills. Ours loves cutting out paper. Work on making paper snowflakes together. Jack was happy with just cutting up pieces of paper and taping them to the window. We’ve got sort of an abstract impressionism vibe going on.
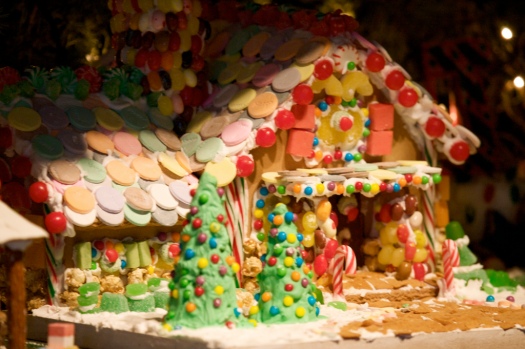
 I’m a big supporter of snail mail. Have your child help you with your holiday cards by including their scribbles and drawings. Jack actually drew a Christmas tree for his preschool teacher, so that definitely was included.
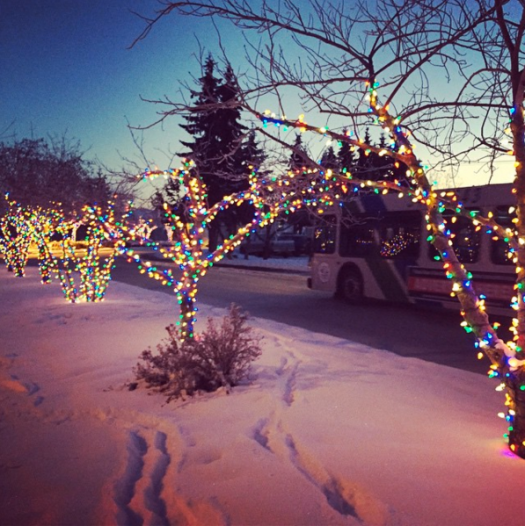 Kids tend to love sparkly things that light up. Thankfully it’s dark most of the time here right now so it’s easy to find trees and houses adorned with twinkly lights. Start off at Town Square Park, which has some of the most stunning blue lighted trees.